Hello friends. I've been missing out on blogging for quite sometime. Busy spring cleaning for the Chinese New Year celebrations and completing some crochet orders for weddings.
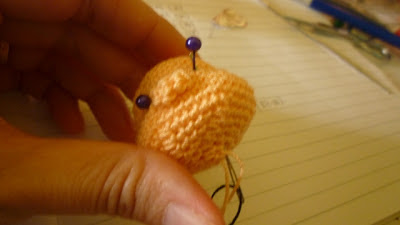
Anyway, just to share with you, a cute Panda toy that my dear friend had requested for her son's upcoming birthday. She want it cute and plump. Meet my Panda.
My friend also wanted something special for her son's birthday party. Something cute and special for his friends. Made 24pcs of Panda theme keychains for the kids to hang at the zipper of their school bag.
Can't resist making it in multicolor felt. Hope the birthday boy loves it.
Thursday, 21 February 2013
Tuesday, 22 January 2013
Wedding Bears
Good day friends.
Have been busy last week with my brother's wedding in Melaka. It was very tiring cooking for the night buffet and preparing for his big day. Feels like I am the one getting married. Hahaha...
Made him a couple Wedding Bears for his car decoration. Here it is :
Aren't they cute?
I also made some hair bands for the flower girls too.
Just look at those cute flower girls. They're suppose to line up at the entrance. Kids will be kids. And the 2 handsome boys with red ties are suppose to blow bubbles. Well... they're certainly happy practicing before the happy couple enter the hall. :P
And these are the Cake Box Goodies that my sister and I made for each banquet table. 10 slices of cake box with sweet goodies inside for each table. All handmade with love.
Happy reading.
Have been busy last week with my brother's wedding in Melaka. It was very tiring cooking for the night buffet and preparing for his big day. Feels like I am the one getting married. Hahaha...
Made him a couple Wedding Bears for his car decoration. Here it is :
Aren't they cute?
I also made some hair bands for the flower girls too.
Just look at those cute flower girls. They're suppose to line up at the entrance. Kids will be kids. And the 2 handsome boys with red ties are suppose to blow bubbles. Well... they're certainly happy practicing before the happy couple enter the hall. :P
And these are the Cake Box Goodies that my sister and I made for each banquet table. 10 slices of cake box with sweet goodies inside for each table. All handmade with love.
Happy reading.
Tuesday, 8 January 2013
Eight Immortals Cross Stitch
Morning friends.
Just to share with you guys a project that I had completed recently.
It took me 2 years to complete. Hehehe... well, you can't blame me because with 2 hyper active kids, I don't have much time on my hands to complete. Since cross stitch need concentration, the best time is when they're napping.
I just love how it turns out. The facial expressions and details of this pattern is amazing.
Just to share with you guys a project that I had completed recently.
It took me 2 years to complete. Hehehe... well, you can't blame me because with 2 hyper active kids, I don't have much time on my hands to complete. Since cross stitch need concentration, the best time is when they're napping.
I just love how it turns out. The facial expressions and details of this pattern is amazing.
Wednesday, 12 December 2012
Felt Projects
I was so excited when I bought this felt pack. The colors just made me eager to create and make something out of it. For me, these felt are a "Rainbow of Inspirations".
Felt like a school girl again. Hehehe... here's what I've tried doing. Sewing felt is actually new to me. But now, I'm beginning to get addicted.
| Here's my felt Santa. Luckily it turned out nicely. |
| Made another one for a dear friend |
| Santa ready + packed + delivered |
Saturday, 17 November 2012
Free Santa Hanging Ornament
Hello friends. Hope everyone is having a great day.
Firstly, I would love to say THANK YOU for all my readers for their support and kind encouragement for my craft. It really makes my day a happy one.
Christmas is near and I would like to share with you a pattern that I've just finished writing. Santa Hanging Ornament, for your Christmas Tree, or decoration or if you like, as a keychain.
Here it is. Enjoy and Happy Crochet !
This pattern is crochet in round, unless stated otherwise. You can use any type of yarn.
Nose:
Rnd 1: ch 2, 4sc in 2nd ch from hook (4)
Rnd 2-3 : sc around
Finish off, leaving a long tail for sewing
Position nose at the center of the face (Rnd 9-10), and sew on.
Position eyes with pins and then sew on with beads or plastic eyes.
Beard :
I use white thicker wool yarn for this. Ch16 and work loop stitch across. Repeat this for another row or 2 rows according to your preference.
Position the beard with pins around the face before sewing.
Hat :
With red yarn
Rnd 1 : Ch 33 and join with slip stitch to form a ring.
Rnd 2-5 : sc around
Rnd 6 : (9sc, dec) 3x (30)
Rnd 7 : sc around
Rnd 8 : (8sc, dec) 3x (27)
Rnd 9-10 : sc around
Rnd 11 : (7sc, dec) 3x (24)
Rnd 12 : sc around
Rnd 13 : (6sc, dec) 3x (21)
Rnd 14-15: sc around
Rnd 16: (5sc,dec) 3x (18)
Rnd 17 : sc around
Rnd 18 : (4sc,dec) 3x (15)
Rnd 19: (3sc,dec) 3x (12)
Rnd 20: (2sc,dec) 3x (9)
Rnd 21: (sc,dec) 3x (6)
Finish off.
Turn the hat upside down and join with white yarn. Crochet 3 rows. Add a pom pom at the tip of the hat.
Sew the hat to the face and it's done.
You can tie a string through the hat to make it an ornament or just fasten a keychain ring and make it into a keychain. Lovely as a decoration and thoughtful and cute as a gift.
Hope you will enjoy making this as much as I do.
Firstly, I would love to say THANK YOU for all my readers for their support and kind encouragement for my craft. It really makes my day a happy one.
Christmas is near and I would like to share with you a pattern that I've just finished writing. Santa Hanging Ornament, for your Christmas Tree, or decoration or if you like, as a keychain.
Here it is. Enjoy and Happy Crochet !
This pattern is crochet in round, unless stated otherwise. You can use any type of yarn.
Head
:
With skin color yarn
Rnd 1 :
ch 2, 6sc in 2nd ch from hook (6)
Rnd 2 :
2sc in each st around (12)
Rnd 3 :
(sc, inc) x 6 (18)
Rnd 4 :
(2sc, inc) x6 (24)
Rnd 5 :
(3sc, inc) x 6 (30)
Rnd 6 - Rnd 8 : sc around (30)
Rnd 9 : (2sc in next 2 st, 13sc) 2x (34)
Rnd 10: (2sc in next 4 st, 13 sc) 2x (42)
Rnd 11-12 : sc around (42)
Rnd 13 : (5sc, dec) x6 (36)
Rnd 14 : (4sc, dec) x6 (30)
Rnd 15 : (3sc, dec) x6 (24)
Rnd 16: (2sc, dec) x6 (18) ~ Begin stuffing
Rnd 17: (sc, dec) x6 (12)
Rnd 18: dec around (6)
Finish off, leaving a long tail for sewing
| Shape of the face when it's finished |
Nose:
Rnd 1: ch 2, 4sc in 2nd ch from hook (4)
Rnd 2-3 : sc around
Finish off, leaving a long tail for sewing
Position nose at the center of the face (Rnd 9-10), and sew on.
| Position the nose t o the center of the face |
Position eyes with pins and then sew on with beads or plastic eyes.
| Place pins for eyes before sewing |
| Insert needle through bottom of the head to the pin |
| Insert a bead for the eye and insert needle 1 row below |
| Insert needle through the other pin place and repeat the same process |
| After slipping the bead for eye, insert 1 row below and through the bottom of the head again |
| Tie string at the bottom of the head to complete |
I use white thicker wool yarn for this. Ch16 and work loop stitch across. Repeat this for another row or 2 rows according to your preference.
Position the beard with pins around the face before sewing.
| position beard with pins for better adjustment |
Hat :
With red yarn
Rnd 1 : Ch 33 and join with slip stitch to form a ring.
Rnd 2-5 : sc around
Rnd 6 : (9sc, dec) 3x (30)
Rnd 7 : sc around
Rnd 8 : (8sc, dec) 3x (27)
Rnd 9-10 : sc around
Rnd 11 : (7sc, dec) 3x (24)
Rnd 12 : sc around
Rnd 13 : (6sc, dec) 3x (21)
Rnd 14-15: sc around
Rnd 16: (5sc,dec) 3x (18)
Rnd 17 : sc around
Rnd 18 : (4sc,dec) 3x (15)
Rnd 19: (3sc,dec) 3x (12)
Rnd 20: (2sc,dec) 3x (9)
Rnd 21: (sc,dec) 3x (6)
Finish off.
Turn the hat upside down and join with white yarn. Crochet 3 rows. Add a pom pom at the tip of the hat.
Sew the hat to the face and it's done.
You can tie a string through the hat to make it an ornament or just fasten a keychain ring and make it into a keychain. Lovely as a decoration and thoughtful and cute as a gift.
Hope you will enjoy making this as much as I do.
Thursday, 8 November 2012
Meet Ms Blossom
Morning friends. The sky is so bright today. Such a sunny weather, but usually around evening the sky would turn grey and... heavy rain. Weather is so unpredictable these days. According to The Star newspaper today, rainstorm is expected soon with 2-3 days of rain. Many areas in Johor, Melaka and Perak would be affected. My prayers for the flood victims.
During these rainy days, I stayed indoors. And... let me introduce you to Ms Blossom. She's only 7cm tall, crochet from fine crochet thread.
I made her a little pink cardigan and a blue shoulder bag. Plus a red flower for cuteness and she's ready to go. Her arms and legs are thread jointed and moveable. It's really a challenge to make such small design, and really strains my fingers. But the result is worth it.
Here's a few more shots of her. Enjoy and have a nice day.
During these rainy days, I stayed indoors. And... let me introduce you to Ms Blossom. She's only 7cm tall, crochet from fine crochet thread.
I made her a little pink cardigan and a blue shoulder bag. Plus a red flower for cuteness and she's ready to go. Her arms and legs are thread jointed and moveable. It's really a challenge to make such small design, and really strains my fingers. But the result is worth it.
Here's a few more shots of her. Enjoy and have a nice day.
Wednesday, 7 November 2012
Crochet Pattern
Hi friends. Just to let you all know that my Christmas Blue Elf Pattern is available for sale in pdf format. A few of my readers have requested for this cute pattern. If you're interested, do drop me an e-mail at lenafoong@hotmail.com. Thanks.
Subscribe to:
Posts (Atom)